Why I No Longer Use ETTR for Wildlife Photography

If you're still "exposing to the right" (ETTR) like we all did back in 2012, it's time to rethink your wildlife photography strategy. I did it myself for years—but recently realized the rules have dramatically changed.

Modern camera sensors, such as those in the Canon R5, R3, Nikon Z9, and Sony A1, have drastically improved dynamic range and shadow recovery capabilities. Today, intentionally underexposing your images slightly can actually preserve critical highlights and provide greater editing flexibility later on.

In this article, I'll explain why ETTR is outdated for wildlife photography in 2025, how I now expose my images, and when ETTR might still be beneficial.

What is ETTR (Expose to the Right)?

"Expose to the Right," or ETTR, is a photography technique that was popularized more than a decade ago. The concept involves pushing your camera's histogram as far right as possible without clipping highlights. By maximizing the amount of captured light, you collected more data in the brighter areas of the image, resulting in cleaner files with less noise and better color quality—especially in the shadow areas.

This approach made perfect sense back in the era of early DSLRs like the Canon 5D Mark II or Nikon D700. These cameras had (relatively) limited dynamic range, particularly at higher ISO settings. Pulling up shadows in post-processing would often reveal ugly noise, discoloration, and loss of detail.

ETTR was the logical solution, allowing photographers to capture more image data upfront and reduce reliance on heavy shadow adjustments later. However, the photography landscape has significantly evolved.

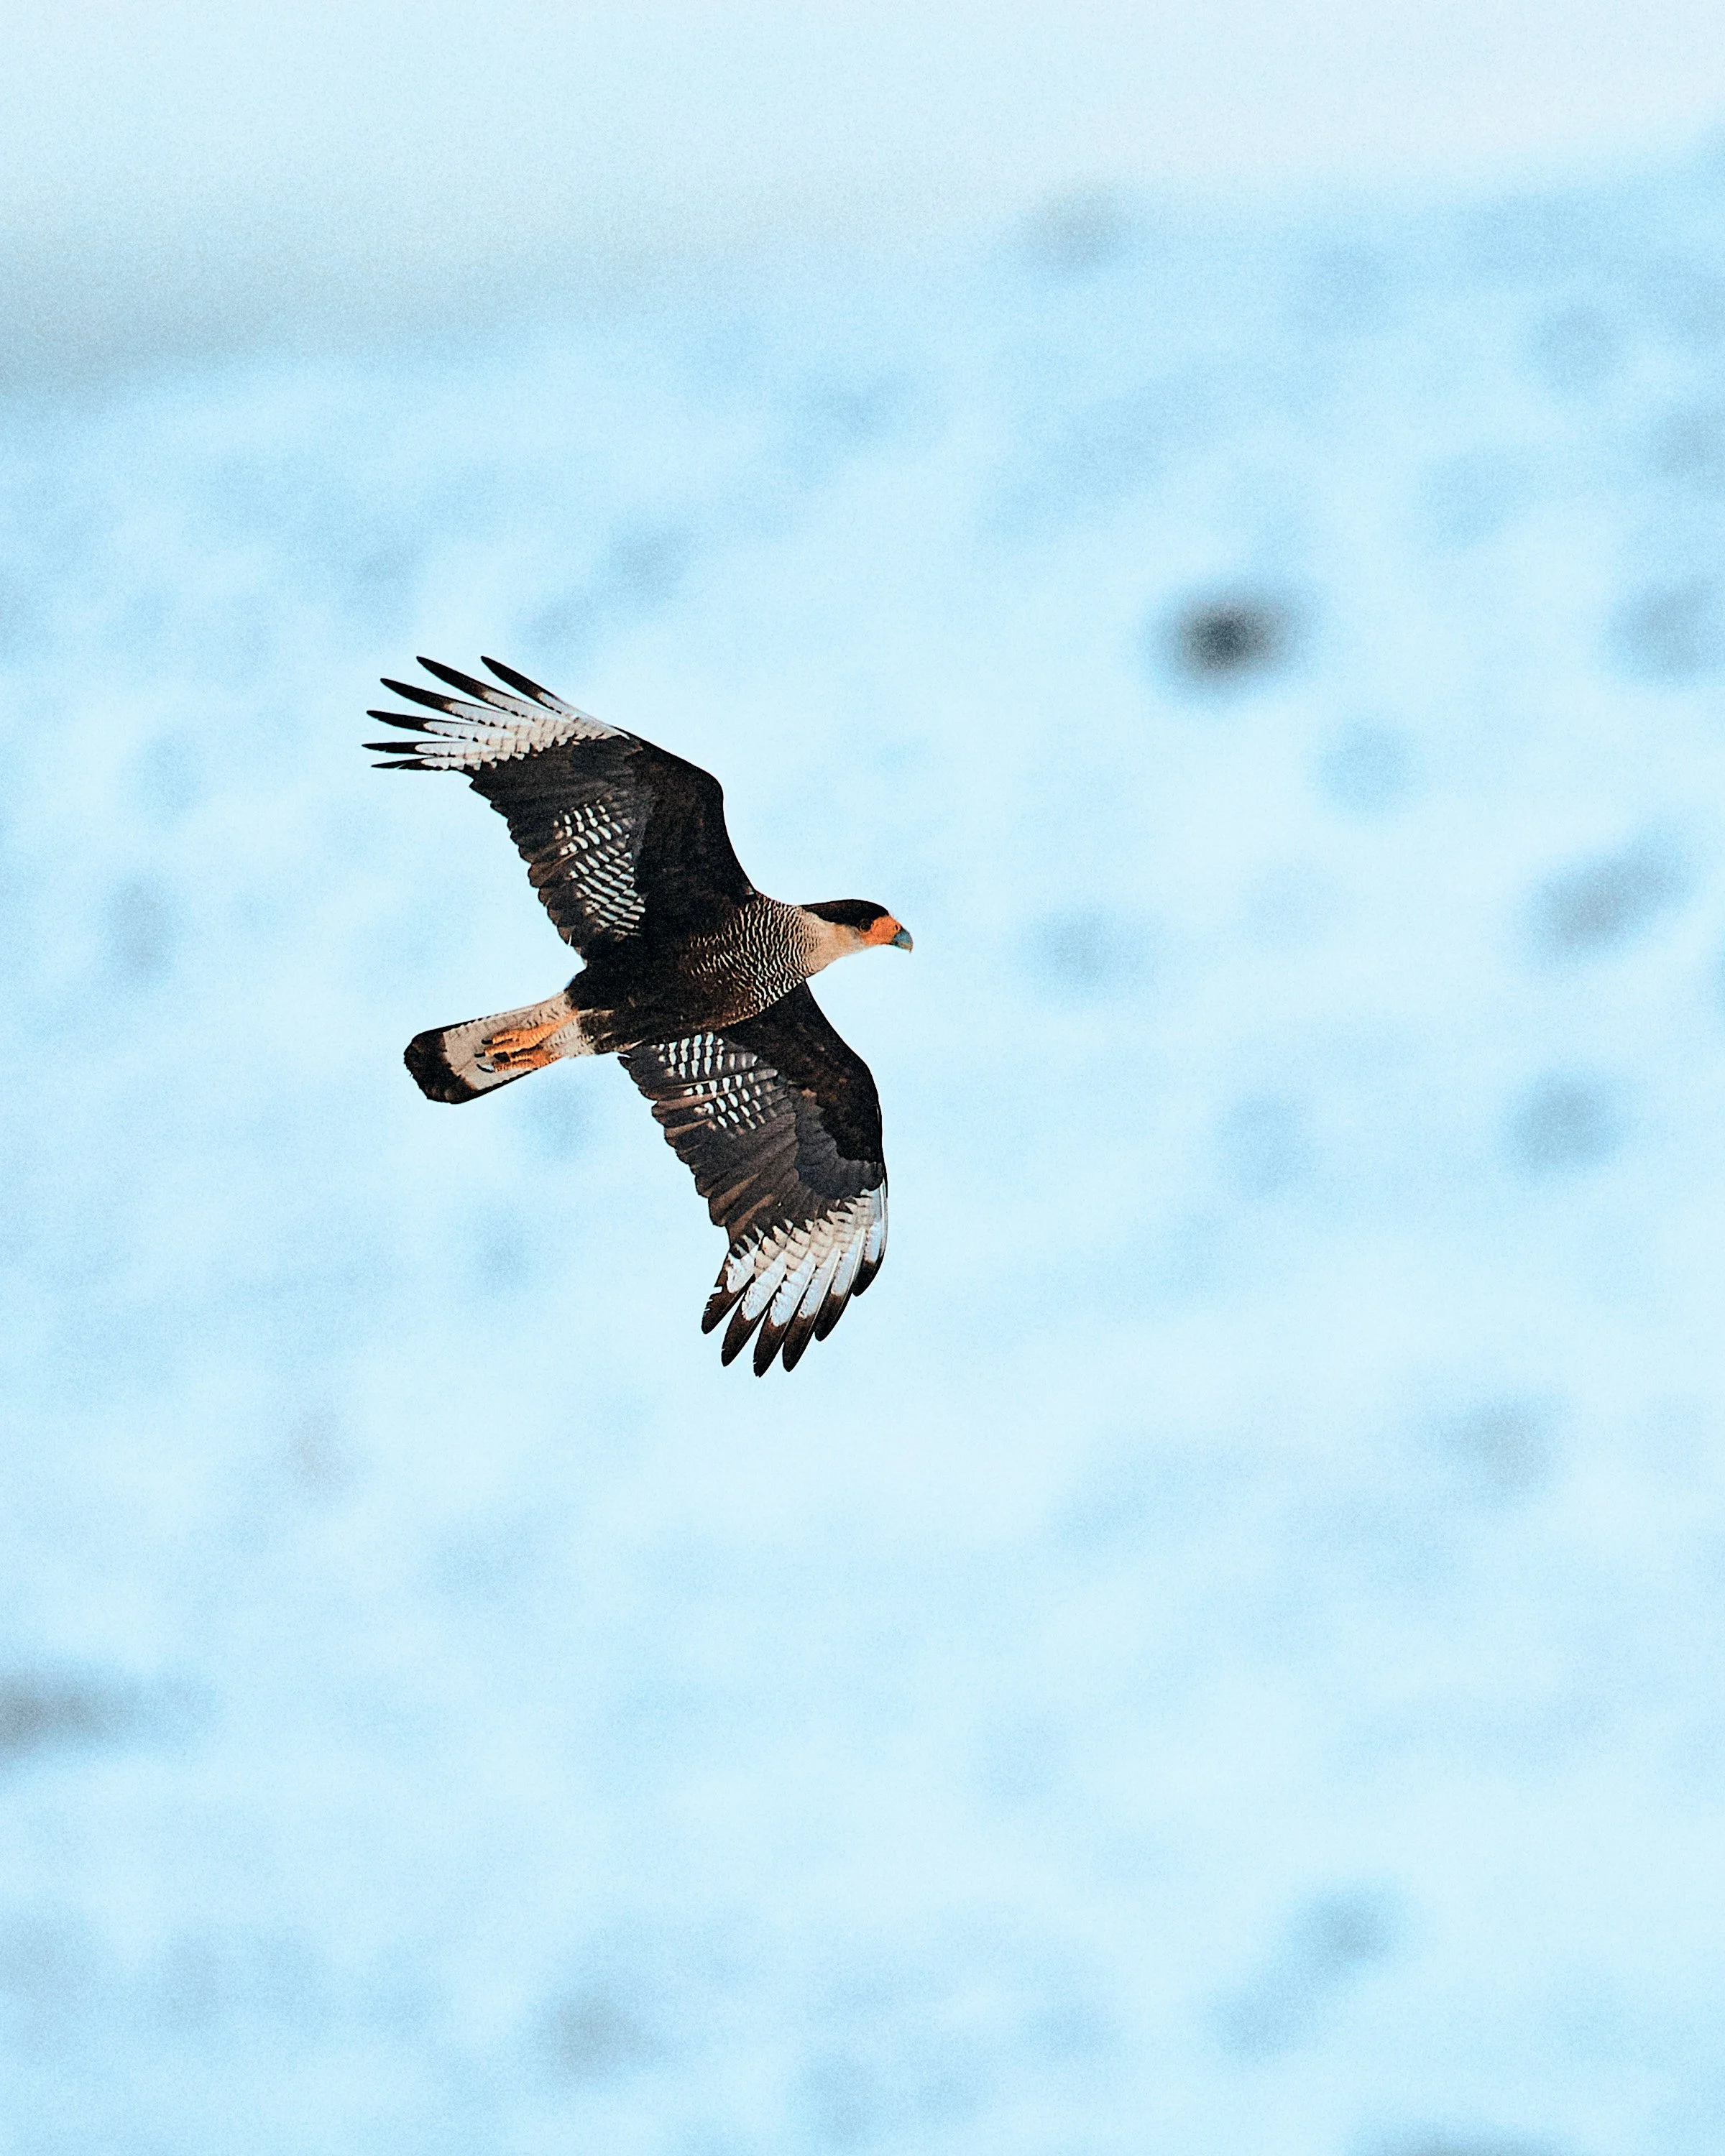
A photo captured with Canon R3 at 20.000 ISO

Why ETTR is Now Outdated for Wildlife Photography

Today’s mirrorless cameras have completely changed the game. Sensors in cameras like the Canon R5, R3, Nikon Z9, or Sony A1 offer incredible dynamic range and impressive shadow recovery. It's now common to recover shadows by three stops or even more without noticeable quality loss.

But there’s one big catch: blown highlights are still irrecoverable. Once highlights clip—like bright feathers on a bird or sunlit fur on a predator—no amount of editing can recover those details.

In wildlife photography, conditions change rapidly. Animals move unpredictably, backgrounds shift, and lighting conditions vary in seconds. Using ETTR in these scenarios often means guessing exposure, risking highlight loss, and potentially missing shots you can't retake.

Underexposing slightly, on the other hand, helps preserve essential highlight detail, giving you more flexibility when editing RAW files later.

My New Approach: Smart Underexposure

My current technique involves intentionally underexposing images by approximately two-thirds to one full stop, especially in high-contrast or brightly lit situations. This approach ensures I retain highlight details and gives me room for shadow recovery without compromising image quality.

Here's exactly how I set up my camera in the field:

  • Shoot Manual mode with Auto ISO: This lets me precisely control shutter speed and aperture while the camera automatically adjusts ISO to balance exposure.

  • Enable Highlight Alerts (Zebras): This visual indicator quickly shows if highlights are close to clipping, so I can adjust accordingly.

  • Histogram management: I aim for a histogram that approaches the right edge without touching it, ensuring no crucial details are lost.

  • Rely on RAW data, not JPEG previews: The camera's JPEG preview can be misleading. Always check your RAW histogram and confirm recoverable details later in post-production software like Lightroom or Capture One.

By following this workflow, even in challenging lighting, I maintain maximum flexibility to adjust shadows and exposure in post-processing.

Is ETTR Ever Still Useful?

Does this mean ETTR is completely obsolete? Not quite—there's still one specific scenario where ETTR remains beneficial: extremely low-light photography at high ISO settings.

For instance, pre-dawn wildlife drives or evening shoots in dim forests are scenarios where noise—not highlights—is the primary enemy. Here, pushing the exposure slightly to the right helps produce cleaner images straight out of camera, reducing reliance on shadow brightening, which can drastically increase noise.

In low-light situations, I:

  • Open my lens aperture wide (f/2.8 or f/4).

  • Lower shutter speed as far as practical for sharp images.

  • Push the histogram rightward cautiously, ensuring no highlights clip.

Since these environments typically have low contrast and limited dynamic range, capturing a brighter initial exposure minimizes noise and produces higher-quality images overall.

Final Thoughts: Smart Underexposure is the Real Wildlife Photography Hack

While ETTR had its merits in the DSLR era, modern mirrorless cameras have shifted the photography landscape significantly. In 2025, careful, intentional underexposure—prioritizing highlight protection—is the superior strategy for wildlife photographers.

By exposing for flexibility, protecting highlights, and confidently working with shadows in post-processing, you'll consistently capture better wildlife images.

Still struggling with tricky lighting and high ISO scenarios? You're not alone. I made a comprehensive video on managing low-light wildlife photography, packed with practical insights for cleaner, sharper photos.

Watch my full video guide on managing tricky low-light wildlife photography here.


Featured articles

Ultimate Autofocus Trick: Use Servo and One-Shot AF at the Same Time!

I've been photographing wildlife professionally for years now, primarily using cameras like the Canon R5 and Canon R3. After countless hours tweaking settings, customizing buttons, and experimenting in the field, I've discovered something that completely changed my workflow - something I wish I'd known sooner. Today, I'm sharing my new favorite autofocus customization that allows you to use continuous (SERVIO) autofocus and single (ONE-SHOT) autofocus simultaneously—without ever diving into your camera menu while you're out shooting.

If you photograph wildlife, birds, or any fast-moving subjects, this autofocus setup could transform your photography as well.

Understanding Autofocus Modes: Servo AF vs. One-Shot AF

Before we dive into the setup, let's quickly recap the two main autofocus modes that photographers use most frequently:

  • Continuous Autofocus (Servo AF / AF-C):
    In this mode, your camera continuously adjusts the focus to track and keep a moving subject sharp. It's ideal for wildlife, sports, or action scenes where subjects move unpredictably.

  • Single Autofocus (One-Shot AF / AF-S):
    Here, your camera locks focus once, and it remains fixed until you refocus manually. It’s excellent for stationary subjects, precise framing, or scenes where you don't want the autofocus to shift unexpectedly.

Why Servo AF Isn’t Always Perfect

Servo AF is powerful, especially with modern mirrorless cameras. However, even the most advanced autofocus tracking systems sometimes struggle, particularly:

  • In cluttered scenes (branches or leaves in front of your subject).

  • Low-contrast lighting (foggy mornings or dusk conditions).

  • When you want to deliberately lock focus on a specific element in the frame and recompose.

In these situations, continuous autofocus can get confused, causing missed shots and frustration in the field.


👉 Quick tip: If you're into wildlife photography and want more field-tested tips, download my free 100-page wildlife photography eBook. It’s packed with gear advice, camera settings, and in-field techniques to elevate your photography.

My Previous Workarounds (and Why They Didn’t Work)


Initially, I separated autofocus from my shutter button, assigning AF activation exclusively to the back AF-ON button. This setup (also known as "back-button focusing") gave me good control but still required frequent switching between SERVO and ONE-SHOT modes depending on the situation.

I tried assigning different buttons - front buttons on the R3, FN buttons on the R5 - to quickly switch modes, but this still meant fiddling with camera settings during critical moments. Inevitably, I would sometimes forget to switch modes back, resulting in out-of-focus shots at the worst possible times.

I needed a solution to have both autofocus modes instantly accessible at any given moment—without diving into camera menus.

The New Autofocus Setup: Servo and One-Shot AF Simultaneously

After experimenting extensively, I've finally found the perfect customization that lets me seamlessly use Servo and One-Shot AF at the same time. Here’s exactly how I set it up on my Canon R5:

Step-by-Step Autofocus Setup (Canon R5)

  1. Go to the Autofocus Menu:

    • Set AF Operation to SERVO AF.

    • Set AF Method to Tracking + Subject Recognition.

    • Choose your subject (Animals, People, Vehicles).

    • Disable Continuous AF (to conserve battery life and avoid unnecessary AF movement).


2. Customize Your Buttons:

  • In the "Customize Buttons" menu, set the Shutter Button to trigger both Exposure Metering and AF. This activates continuous autofocus with tracking when half-pressed.

  • Set the AF-ON button similarly to trigger Exposure Metering and AF, but now press the INFO button to access the sub-menu:

    • Change AF Operation to ONE SHOT AF.

    • Change AF Method to SPOT AF (for precise, single-point focusing).

This simple yet powerful setup lets you instantly switch autofocus modes with a single button press:

  • Half-pressing your shutter button triggers Servo AF with tracking, ideal for action and moving subjects.

  • Pressing and holding the AF-ON button activates precise One-Shot AF, ideal for stationary or carefully composed scenes.

In the field with the R3

Adjustments for Canon R3 Users:

On the Canon R3, subject tracking is always activated and cannot be completely disabled, so you slightly adapt this setup (which I fully explain in detail in my YouTube video).

SEE FULL VIDEO TUTORIAL

Real-World Benefits of This Autofocus Setup

With this setup, you gain instant access to both autofocus modes in the field. For example:

  • Tracking a running cheetah? Half-press your shutter button and let Servo AF keep it sharp.

  • Suddenly spot a perched bird hidden among branches? Instantly press the AF-ON button, lock your focus precisely, and recompose confidently.

One Additional Autofocus Tip for Telephoto Users

If you're using super-telephoto lenses, occasionally the autofocus might jump to a distant background or foreground, losing your subject completely. When this happens, it takes precious seconds for your camera to find your subject again.

The solution: use your lens’s focus preset feature. Many telephoto lenses allow you to set a specific focus distance and instantly recall it with a single twist or button press. This vastly reduces focus-hunting and ensures you never lose critical moments.

I've created a full tutorial dedicated to making the most out of this underrated telephoto function. Don't head out on your next photography adventure without checking that out.

Final Thoughts and Next Steps

By implementing this autofocus setup I drastically improved my hit rate for sharp images - especially in complex, fast-changing wildlife scenarios. Give it a try on your camera and see how it transforms your own shooting experience.

Don’t forget to subscribe to my YouTube channel for more practical wildlife photography insights like this!

Happy shooting!

2025 Guide to Etosha National Park Photography

Etosha National Park is one of the most iconic safari destinations in Africa—and for good reason. Its vast white salt pan, scattered acacia trees, and floodlit waterholes set the stage for some of the most dramatic and consistent wildlife photography anywhere on the continent. Whether you're hoping to capture dust-kicking elephants, backlit black rhinos, or lion prides in the dry grass, Etosha offers an ideal mix of accessibility, wildlife density, and visual drama.

Read More

What’s in My Safari Camera Bag (2025)

A Wildlife Photographer’s Gear Guide for African Safaris

Planning your first (or fifth) African photo safari? Choosing the right gear is one of the biggest factors in whether you come home with just memories or jaw-dropping images. In this guide, we’ll break down my professional safari camera kit built for serious wildlife work in 2025.

This list reflects current best-in-class Canon gear, trusted accessories, and field-tested choices optimized for safari conditions, power limitations, and airline weight restrictions.

Safari along the Chobe River, Botswana

Camera Bodies: What I Still Trust in 2025

Let’s start with the core: the camera bodies. In 2025, Canon’s R3, R5, and R5C remain incredibly capable—even with newer models like the R1 and R5 Mark II entering the scene. While the newer models are indeed more powerful, these “old” bodies still deliver all the image quality, autofocus performance, and reliability you need on safari.

  • Canon R3: My go-to for fast action and low light situations. It provides incredible AF system and low light handling, and the built-in vertical grip make it ideal for long days shooting wildlife on the move.

  • Canon R5: A perfect all-rounder. Lightweight, high-res (45MP), and great dynamic range. It usually stays on my 100-500mm.

  • Canon R5C: If you shoot video as well, this hybrid body handles 8K RAW and gives full manual video control with active cooling—perfect for BTS safari content or cinematic work. These days I am pairing it with the new Canon 100-300mm f2.8. I can make the most of this lens when filming in S35 crop mode, that gives me a 150-450mm f2.8 equivalent, or even add in a 1.4 TC resulting in an impressive 210-630mm f4 equivalent. A total beast for wildlife filming.

So no, you don't need the latest bodies to produce great work. These three still cover 99% of pro-level needs, at least for me.

  • Canon Powershot V1: I just added this new compact camera that seems to be a very capable piece of tech. Of course it’s not a great fit when it comes to wildlife but I think it will fit well in my equipment lineup to film more BTS during self drives and guided safaris, allowing me to share more content with you. During and after my upcoming trip to Botswana and Zambia I’ll be sharing a lot of “from the field” content, so make sure you follow me on Instagram and subscribe to my Youtube channel. Detailed field review coming soon!

Lenses: Covering Every Focal Range

Africa’s varied terrain demands a flexible lens lineup. From dusty open plains to dense forests, choosing the right focal length can make or break a shot. Here’s what goes in the bag:

  • RF 600mm f/4: The staple for long-range wildlife. Especially critical in open areas like CKGR and Etosha, where getting close is rarely possible. I still prefer this one to the 400mm f2.8 as, forcing me to stay a bit further away from the subject, I often get a better angle and a cleaner background.

  • RF 100-500mm: A flexible workhorse. Great for self-drives where you must always be ready for unexpected action. Lightweight, versatile, perfect for subjects on the move.

  • RF 70-200mm f/2.8: One of my go-to in places like South Luangwa, where I’m often closer to the action in lush surroundings. Great for both portrait-style animal shots and bigger shots that show the habitat.

  • RF 24-70mm f/2.8: Always useful for general storytelling, vehicle shots, landscapes and camp life. Essential for giving context to your wildlife subjects.

  • NEW: RF 100-300mm f/2.8: During my upcoming trips I will test this new beast that will hopefully replace the 70-200 + 100-500 mm. Constant 2.8 is great for low light, and early tests suggest phenomenal sharpness. Plus I can pair it with a 1.4x TC getting a powerful 140-420mm f4. A full field review is coming soon.

A shot from back in my Nikon days. Nikon D850, 500mm f4. Etosha NP, Namibia.

➡️ Planning to photograph in Namibia’s open desert landscapes? Check out the Complete Namibia Photo Guide to see how different focal lengths perform in extreme terrain.

Accessories That Make Life Easier in the Field

Accessories might not be flashy, but they’re what keep your kit running smoothly day after day.

  • Canon RF 1.4x Teleconverter: Perfect for boosting reach on the 600mm or 100-300mm when you need it. Minimal quality loss, especially in good light.

  • Angelbird CFexpress Cards: Fast, reliable, and tough. When you’re recording 8K or rapid bursts of action, these cards won’t choke.

  • Electronic Blower: Dust is inevitable in Africa. This is safer than canned air and more effective than manual blowers. Use it at camp or mid-drive when changing lenses.

  • Goal Zero Sherpa 100 Power Bank: On self-drives or multi-day bush camps without power, this keeps everything charged—bodies, phones, even laptops. Compact enough to bring as carry-on.

Off the grid in the Kalahari region.

Big Lenses: Pros and Cons for Safari Travel

There’s a constant debate in the field: bring the big glass or not?

Pros of Big Lenses (like 600mm f/4):

  • Sharpness and subject isolation are unmatched.

  • Allows you to shoot tighter from farther away—essential for shy species.

  • Pairs beautifully with teleconverters without killing image quality.

Cons:

  • Heavy and bulky—harder to travel with, especially on small aircraft.

  • Not as flexible when shooting in tight or fast-paced environments.

  • Requires a solid monopod or beanbag setup for best results.

If you’re traveling by charter or bush planes with strict carry-on limits, consider shipping gear ahead with your operator or swapping the 600mm for a more versatile and compact zoom like the 100-300mm f/2.8, paired with a 1.4x extender.

Tips for Safari Carry-On & Packing

  • Always carry your camera bodies and lenses onboard. Never check them in, especially if flying through hubs like Johannesburg or Addis Ababa.

  • Use a modular camera backpack, like an F-Stop Tilopa (my go-to) and keep weight under the stated limit.

  • Bring a small shoulder camera bag as your “personal item” to distribute weight.

  • If questioned at check-in, calmly explain the value of your gear and your need to keep it protected. In most cases, airline staff will allow exceptions.

Crossing the Namib desert on a small bush plane.

Packing for a safari is about knowing your destination, planning for the unexpected, and bringing only what helps you create your best work in the field. The gear above has been tested across deserts, forests, wetlands, and remote tracks—and it's built to perform when the action happens fast.

🎒 Want to see how this gear performs in real conditions—and learn how to use it in the wild? Join one of my upcoming wildlife photography workshops. From Namibia’s dunes to Botswana’s wild rivers and the predator-rich South Luangwa, every trip is handcrafted for photographers who want to improve their craft and walk away with shots that matter.


Best Time to Visit Africa for Photography

Choosing the best time to visit Africa for safari photography is one of the most important decisions when planning a photo trip. With its vast landscapes, varied ecosystems, and dynamic wildlife movements, Africa offers exceptional photographic opportunities year-round—but not all months are created equal. Timing impacts everything from light conditions to animal behavior, vegetation cover, and travel logistics. This guide will help you navigate the differences between seasons and regions, understand key wildlife events, and plan an itinerary that matches your photographic goals.

Dry vs. Wet Season: Understanding the Basics

Africa’s safari destinations generally fall into two main seasonal categories: the dry season and the wet (or green) season. Each has distinct advantages and challenges for photography.

Dry Season (typically May–October)

  • Wildlife visibility is at its peak. Water becomes scarce, concentrating animals around rivers, waterholes, and pans—creating consistent photographic opportunities.

  • Vegetation thins out, improving visibility and making it easier to track and photograph wildlife from a distance.

  • Clear skies and golden light dominate, especially in the mornings and late afternoons—ideal for dramatic backlighting and clean subject isolation.

  • Roads and trails are dry and easier to navigate, reducing travel complications.

Wet Season (typically November–April)

  • Lush landscapes make for vibrant, moody backgrounds—excellent for wide compositions and storytelling shots.

  • Birdlife is at its best, with migratory species in breeding plumage and increased activity around water bodies.

  • Many species enter breeding or calving seasons, leading to unique behavior, new life, and predator-prey interaction.

  • Rain showers can lead to dramatic skies, mist, and cloud formations, creating rich atmosphere for landscape and wildlife shots alike.

Month-by-Month Guide Across Regions

To make the most of your safari photography, it’s essential to consider both timing and location. Here’s a month-by-month breakdown of key regions and what photographers can expect:

January to March

  • Central Kalahari Game Reserve (Botswana): The wet season transforms the desert into a blooming savanna. Plains game like oryx, springbok, and hartebeest are plentiful, and big cats are highly active, using the thick grasses for cover.

  • South Luangwa (Zambia): The emerald season begins. Lush vegetation and flooded lagoons create mirror-like reflections, while elephants, hippos, and birdlife dominate the scene. Most places, however, are unreachable due to flooded roads.

  • Ngorongoro Crater & Southern Serengeti (Tanzania): Calving season for wildebeest attracts predators like lions and hyenas. Cloud cover offers diffused light, great for soft, low-contrast portraits.

April to June

  • Khwai & Moremi (Botswana): Early dry season brings clearer skies and optimal game viewing without the crowds. Ideal for leopard tracking and elephant herds crossing the Khwai River.

  • Ruaha & Selous (Tanzania): Fewer tourists, and wildlife becomes more concentrated as seasonal rivers begin to dry.

  • Etosha (Namibia): Shoulder season begins in May. Wildlife begins congregating near waterholes, offering dramatic interactions between prey and predators.

July to September

  • Masai Mara (Kenya): Peak of the Great Migration. Expect dramatic river crossings, dust clouds, and intense predator action. Also, large gatherings of photographers—planning ahead is essential.

  • South Luangwa (Zambia): This is prime time for leopards and lions. Dry riverbeds and orange skies make for classic African safari frames.

  • Mana Pools (Zimbabwe): Elephants standing on their hind legs to reach trees—a unique behavioral photo opportunity.

October to December

  • Chobe & Savuti (Botswana): Late dry season heat draws huge herds to remaining water sources. Excellent for elephant photography, lion dynamics, and dramatic dust light.

  • Khwai: High predator concentration continues. Expect golden light, low vegetation, and clean backgrounds.

  • Namibia’s Skeleton Coast & Sossusvlei: The contrast of wildlife against stark, arid desert backdrops is at its best. Think desert-adapted elephants, oryx on dunes, and lone giraffes under glowing skies.

Photographic Highlights by Season

Each season offers something unique for photographers:

  • Calving & birthing seasons: January–March in Serengeti (Tanzania) and Kruger National Park (South Africa)

  • Predator activity peaks: mostly in August–October in Etosha NP, South Luangwa NP, Lower Zambezi NP (dry season)

  • Bird migrations: November–February in Botswana, Zambia, Northern Namibia and Kenya

  • Elephant behavior: Best in dry season months (July–October), especially in Chobe, South Luangwa, and Tarangire

  • Big cat tracking: Stronger in Khwai (year-round), Mara (July–Sept), and South Luangwa (June–October)

Sample Itineraries Based on Season

Here’s a look at some of the real-world itineraries from my guided wildlife photography workshops, designed to align with peak conditions for photography and wildlife activity:

March – Patagonia Puma Tracking
Track wild pumas in the dramatic landscapes of southern Chile. This trip focuses on low-angle stalking shots, golden backlight opportunities, and minimalist compositions in open terrain.

May – Kalahari Safari Adventure (CKGR & Beyond)
A deep dive into Botswana’s Central Kalahari Game Reserve. Expect big cats, dramatic desert light, and the feeling of true wilderness—far from the crowds.

May – Iconic Namibia
From the dunes of Sossusvlei to the wildlife-rich pans of Etosha, this itinerary is built for diversity: landscapes, desert elephants, and classic big game.

September – South Luangwa (Zambia)
Leopard central. This trip takes place during the dry season, when wildlife congregates around the Luangwa River. Incredible for predator action, dust, and light.

October – Wild Namibia
This itinerary explores Damaraland, Etosha, and beyond—perfect for backlit elephants, dramatic skies, and a mix of arid and savanna ecosystems.


Final Tips for Choosing When to Go

  • Define your style: Do you prefer storytelling scenes, clean portraits, or intimate behavior? Let that guide your timing.

  • Understand trade-offs: Wet season offers mood and action; dry season gives you clarity, access, and consistency.

  • Factor in travel style: Self-drive safaris (e.g., Namibia or Botswana) are easier during dry months due to road conditions.

  • Use location-specific knowledge: Some parks are excellent year-round, like Khwai, while others—like CKGR—are best only during a short window.

📚 Need help deciding which safari fits your style? Download the free Wildlife Photography eBook for a deeper breakdown of gear, planning, and field techniques.

Ready to Experience These Seasons for Yourself?

If you’re serious about building a powerful wildlife photography portfolio—and doing it in a small group led by professionals who understand the light, the timing, and the animals—consider joining one of my upcoming workshops.

We photograph in the best locations at the best times, with itineraries built around real field experience. From the Kalahari to South Luangwa and Namibia’s deserts, every trip is crafted for photographers who want results.

Decoding the Creative Process in Wildlife Photography

I’ve often asked myself: What makes a successful photographer? Is it raw talent—some genetic gift that lets certain people see the world differently—or is it just relentless practice and a stubborn refusal to quit? I’ve swung between both ideas over the years. There were times when I looked at a National Geographic spread and thought, Wow, that photographer must have been born with a sixth sense for light and composition. And then, other times, I’d remind myself of those endless, frustrating days in the field, tweaking my camera settings over and over, waiting for the perfect moment, missing more shots than I’d like to admit.

It’s human nature to attribute our successes to innate ability and our failures to external circumstances. If I capture an award-winning shot of a leopard in the golden light of the Serengeti, it’s easy to think, That’s just my eye for composition, my instincts kicking in. But when I completely botch a once-in-a-lifetime moment—say, a bald eagle swooping down for a fish and I miss focus—I’m quick to blame the gear, the light, or pure bad luck. The truth, though? Real mastery in wildlife photography means paying just as much attention to what goes wrong as what goes right.

The Myth of Natural Talent

There’s a lingering idea that every world-class photographer was born with an exceptional gift. But let’s break that down. Reinhold Messner, the legendary mountaineer, was once portrayed as some sort of genetic superman—built differently, destined to conquer the world’s highest peaks without supplemental oxygen. Yet, when he was tested in labs, physiologists found nothing remarkable about his body. What set him apart? His ability to relentlessly focus on a goal, stretching the limits of what he knew was possible.

I think about this every time I hear someone say, I could never take photos like that—I just don’t have the talent. If there’s one thing I’ve learned, it’s that success in photography isn’t about an inborn eye for beauty, but about dedication, repetition, and a deep understanding of your craft. The best photographers I know aren’t just talented. They’re obsessive. They go out when the light is terrible just to experiment. They take thousands of photos that never see the light of day, all in the pursuit of that one perfect frame.

Hard Work > Luck

I once heard an NPR interview with a prodigy violinist. The host gushed over her “natural talent,” but she immediately shut it down. She said she was sick of people assuming she was just born gifted. What they didn’t see were the thousands of hours she had spent practicing, the moments when she sacrificed normal teenage fun to perfect her craft. And here’s the kicker: when she slacked off, her performances suffered.

That struck a chord with me because I see the same thing in wildlife photography. If I go weeks without shooting, my first few rolls (or memory cards, in today’s world) feel rusty. My reaction times are slower. I hesitate when I should just trust my instincts. Early in my career, I used to think this meant I wasn’t cut out for it—that “real” photographers could just pick up their cameras and create magic. Then I attended a National Geographic seminar and heard seasoned pros admitting the same thing. Turns out, performance swings are universal. Even top-tier photographers struggle when they’ve been away too long.

The lesson? Photography isn’t like riding a bike. If you don’t use it, you lose it.

The Power of Observation

One thing I’ve noticed about truly great wildlife photographers is that they don’t just see things—they study them. They aren’t just snapping away at every bird or animal that crosses their path. They observe, anticipate behavior, and position themselves accordingly. It’s a habit that often starts in childhood. Studies have found that many of the world’s most creative minds were obsessive collectors as kids—whether it was fossils, stamps, or even beer cans. It wasn’t about the objects themselves, but about learning how to categorize and make sense of the world.

Photography follows a similar pattern. At first, we’re all just collectors—capturing random moments, experimenting, clicking away without much thought. Then, we move into the organization phase, where we start refining what we shoot, becoming selective, and thinking about composition. The real magic happens in the third phase, when we take all that accumulated knowledge and start seeing patterns and possibilities that others don’t. That’s when our work starts to feel truly unique.

Why the Best Photos Feel Personal

I’ve come to believe that our best photographs don’t come from a perfectly planned shot list. They come from moments where we feel deeply connected to what we’re shooting. Have you ever taken a picture that made your heart race? That moment when you just know you’ve captured something special? It’s not about technical perfection. It’s about emotional resonance.

Somebody standing a few feet away from you could take a picture of the same scene, but their version will be different—because creativity isn’t in the camera; it’s in the mind’s eye. Every great image is a product of a lifetime of memories, experiences, and emotions. When we bring all of that into our work, photography stops being just documentation. It becomes art.

Final Thoughts

If you take one thing from this, let it be this: creativity isn’t a gift. It’s a process. Wildlife photography—like any creative pursuit—follows a natural progression. You start by collecting, then organizing, then, with enough time and practice, you begin to create something truly original.

So, the next time you feel like you’re not talented enough, remember: your best work is still ahead of you. Keep shooting, keep learning, and most importantly—stay curious. That’s where the magic happens.

Ready to turn passion into progress, I’d love to invite you to join one of my wildlife photography workshops. We go deep—not just into wild places, but into the craft itself. Whether you’re just starting out or looking to refine your skills in the field, these trips are designed to help you grow, connect with like-minded photographers, and create your best work yet.


FEATURED ARTICLES

Wildlife Photography Workshops: Best Locations to Elevate Your Skills in 2025

Discover the best locations for wildlife photography workshops in 2024! From the vast savannas of Africa to the icy landscapes of the Arctic, find top destinations to refine your skills, capture stunning wildlife shots, and learn from expert photographers.

Read More

Never Miss the Shot Again: How to Use the Focus Preset Feature for Wildlife Photography

When photographing wildlife very often speed is critical. You've likely experienced the frustration of missing focus on fast-moving animals, even with high-end telephoto lenses and the latest camera systems. And the worse situation is when your autofocus is stuck on the background and refuses to jump back and lock into a subject just in front of you. This happens especially with the longest focal lengths, as the foreground can sometimes be so blurred that the camera’s brain can’t recognize a subject close to us.

Read More

Ultimate Guide to Safari Photography: Tips and Techniques for Capturing Amazing Wildlife Photos

A photo safari is one of the most rewarding experiences for photographers. It offers incredible opportunities to photograph wildlife in their natural habitat, but it also comes with challenges unique to this environment. After more than ten years as a professional wildlife and nature photographer, I've gathered techniques that significantly improved my photography during safaris—and today, I'm sharing these insights with you.

Read More